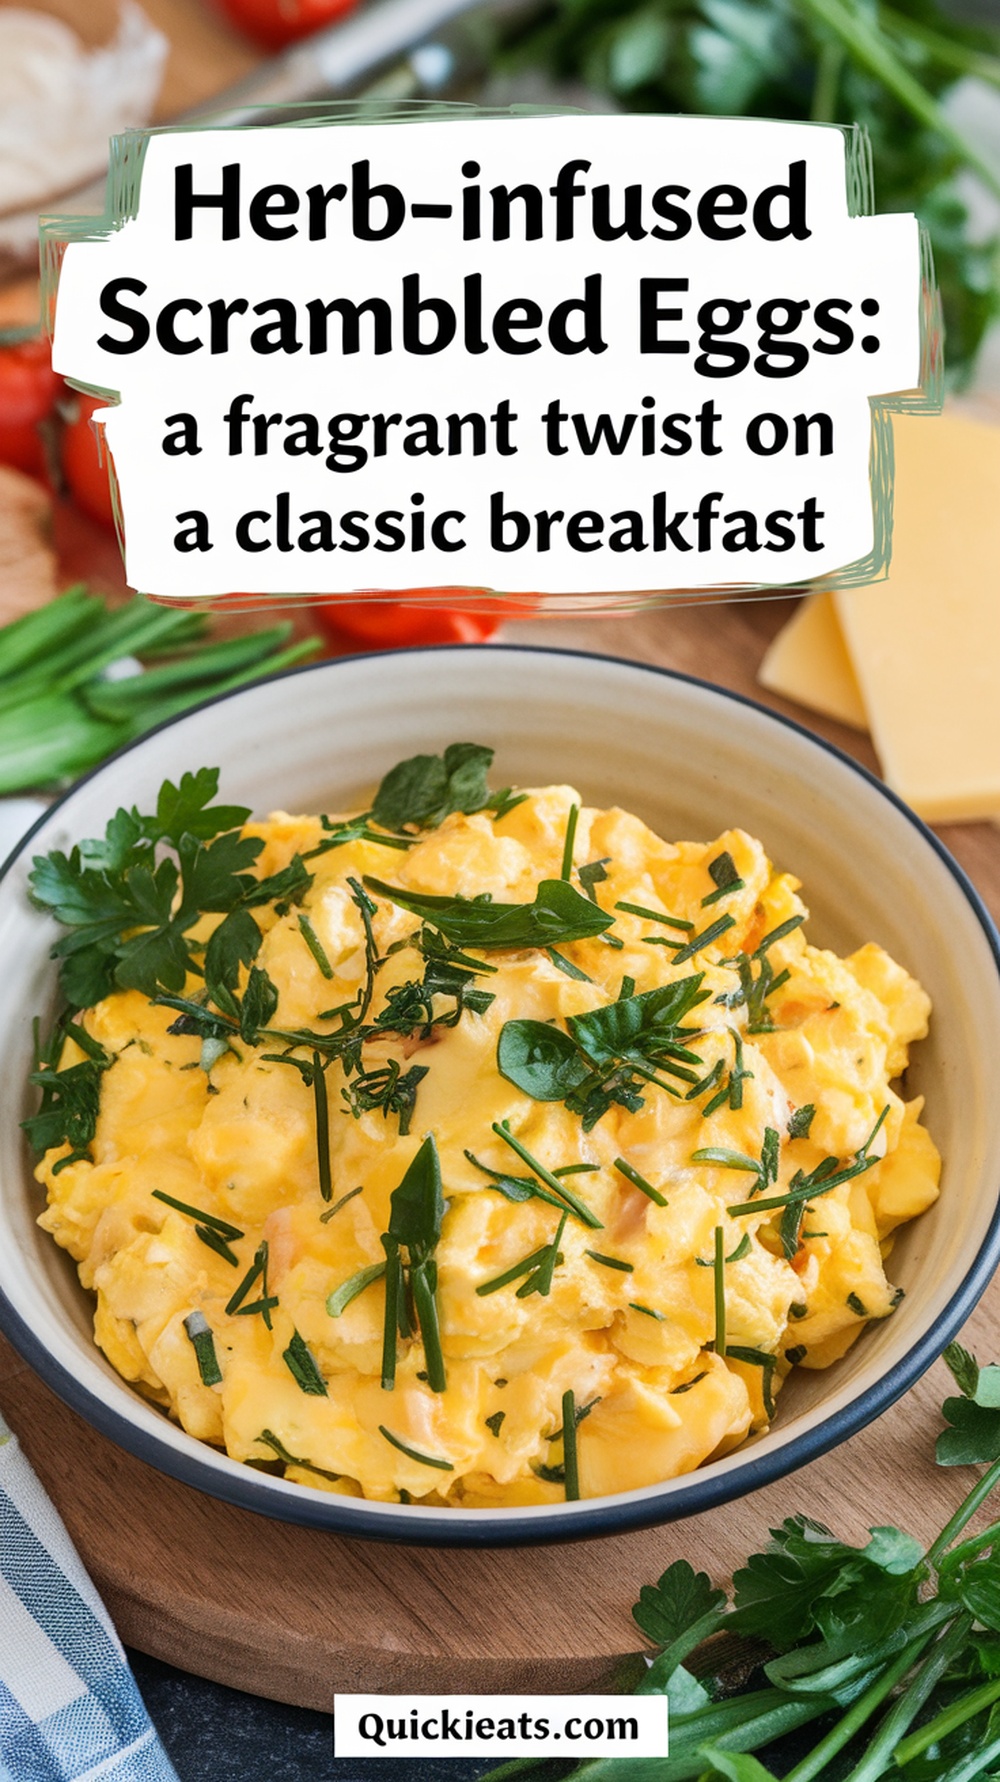
Looking to add some excitement to those morning eggs? A sprinkle of fresh herbs can turn your everyday scramble into something truly special. The simple combination of tender eggs and fragrant herbs creates pure breakfast magic – the kind that makes you excited to get out of bed.
Think soft, pillowy eggs infused with garden-fresh flavors that fill your kitchen with an irresistible aroma. It’s amazing how a few chopped herbs can transform basic scrambled eggs into a dish worthy of a cozy café. The best part? This little upgrade takes almost no extra effort but delivers delicious results every time.
Your taste buds will thank you as they discover hints of fresh basil, chives, or whatever herbs catch your fancy. It’s the perfect balance of familiar comfort and fresh excitement – just what a good breakfast should be. Give those ordinary scrambled eggs the morning glow-up they deserve.
Recipe Overview
| Prep Time: | 5 minutes |
| Cook Time: | 5-7 minutes |
| Total Time: | 10-12 minutes |
| Servings: | 2 servings |
| Cuisine: | International |
| Dietary Information: | Gluten-free, Low-carb, Vegetarian |
Why We Love This Recipe
These herb-infused scrambled eggs elevate a breakfast staple into something truly special. Fresh herbs transform ordinary scrambled eggs into a vibrant, aromatic dish that wakens the senses and delights the palate. The combination of soft, creamy eggs with bright, garden-fresh herbs creates layers of flavor that make every bite interesting and satisfying.
What makes this recipe particularly wonderful is its versatility – it works beautifully with whatever fresh herbs you have on hand, from classic chives and parsley to bolder choices like tarragon or dill.
It’s also incredibly quick to prepare, taking just minutes from start to finish, making it perfect for busy mornings or impromptu brunches.
The dish strikes that perfect balance between simple comfort food and sophisticated flavor, making it suitable for both casual family breakfasts and elegant weekend entertaining.
Plus, it’s naturally low-carb and protein-rich, providing a nutritious start to any day.
Best of all, these scrambled eggs prove that a few fresh ingredients and minimal effort can transform an everyday dish into something memorable and crave-worthy.
It’s the kind of recipe that becomes a trusted go-to, bringing a touch of garden-fresh luxury to your morning routine.
Ingredients
Getting your ingredients ready before you start cooking is key to making perfect herb-infused scrambled eggs.
With just a handful of fresh ingredients, you’ll be ready to create this flavorful breakfast dish.
• 4 large eggs
• 2 tablespoons whole milk or heavy cream
• 1 tablespoon butter
• 1 tablespoon fresh chives, finely chopped
• 1 teaspoon fresh thyme leaves
• 1 teaspoon fresh parsley, finely chopped
• 1/4 teaspoon salt
• 1/8 teaspoon black pepper
• 1/8 teaspoon garlic powder (optional)
For the best results, make sure your eggs are at room temperature before cooking. Fresh herbs will give you the most flavor, but you can substitute dried herbs if needed – just use one-third of the amount called for fresh herbs.
If your butter is unsalted, you might want to add a pinch more salt to the recipe.
Cooking Instructions
Getting the cooking technique right is essential for creating perfectly scrambled eggs that highlight the fresh herbs’ flavors.
The right method guarantees your eggs stay soft and creamy while allowing the herbs to release their aromatic compounds.
Follow these step-by-step instructions to make delicious herb-infused scrambled eggs that bring restaurant-quality results to your breakfast table.
Step 1. Crack Eggs Into Bowl
Before cooking herb-infused scrambled eggs, you’ll need to crack 2-3 fresh eggs into a medium mixing bowl.
Make sure your eggs are at room temperature for the best results – simply leave them out for 15-20 minutes before starting.
Here’s the best way to crack your eggs: Hold each egg firmly in your dominant hand and tap it against the rim of your bowl with medium force.
You’ll want to create a clean crack around the middle, not a shattered mess!
Create a small opening with your thumbs at the crack line, then gently pull the shell apart over your bowl.
Let the egg contents drop smoothly into the bowl, keeping the shell halves facing upward to catch any drips.
Check for any unwanted shell pieces that might’ve fallen in – you can easily remove them using one of the empty shell halves as a scoop.
The egg whites should be clear and glossy, while the yolks should be intact and bright yellow.
If you spot any blood spots or discoloration, it’s best to discard that egg and start fresh with another one.
Step 2. Whisk Herbs With Eggs
Now that your eggs are in the bowl, it’s time to add fresh herbs and seasonings. Grab your favorite combination of herbs like chives, parsley, basil, or thyme – you’ll need about 2 tablespoons total, finely chopped. Don’t forget 1/4 teaspoon each of salt and black pepper.
Using a whisk or fork, beat the eggs and herbs together with smooth, circular motions. You want to incorporate air into the mixture while breaking up the egg whites and yolks completely. Keep whisking until the herbs are evenly distributed and you see a uniform yellow color with small green flecks throughout.
For extra fluffiness, add 1 tablespoon of cold water or milk to the mixture. This will help create lighter, more tender scrambled eggs. Continue whisking for another 30 seconds until everything’s well combined.
Your egg mixture should now be frothy with tiny bubbles on the surface. That’s how you’ll know you’ve whisked enough! The herbs should be floating throughout the mixture rather than clumping together. You’re ready to move on to cooking your perfectly seasoned eggs.
Step 3. Heat Butter in Pan
Place a non-stick skillet over medium heat and add 1 tablespoon of butter. Let it melt completely, tilting the pan to coat the entire cooking surface. You’ll know the temperature is right when the butter starts to bubble gently but isn’t browning.
Watch for the butter to spread evenly across the pan’s surface – this usually takes about 30 seconds. If the butter starts smoking or turning brown, your heat’s too high, so dial it back a bit.
The butter should create a nice, thin coating that’ll prevent your eggs from sticking. You can test the temperature by adding a tiny drop of water – if it sizzles immediately, you’re good to go!
Keep a close eye on your pan during this stage. The sweet spot is when the butter’s fully melted and bubbling slightly, with a warm but not scorching surface. This perfect temperature will help your eggs cook evenly and develop that delicate, creamy texture you’re after.
Once your butter’s properly heated, you’re ready to add those herb-whisked eggs to create your perfect breakfast!
Step 4. Pour Eggs Into Skillet
The sizzling pan beckons for your egg mixture – pour it slowly into the center of the skillet, letting it spread naturally toward the edges. Keep your pour steady and controlled, maintaining about 6-8 inches between the bowl and pan surface to prevent splashing.
Watch as the eggs begin to set around the edges while the center remains slightly liquid. You’ll notice small bubbles forming as the heat works its magic through the mixture. This is exactly what you want to see!
If you’re using a 10-inch skillet, your egg mixture should cover about three-quarters of the pan’s surface. Don’t worry if it doesn’t reach the very edges – you’ll be moving the eggs around soon enough.
Give the eggs about 30 seconds to begin setting before you start any stirring motions. You’ll know they’re ready when the bottom layer starts to become opaque and the edges look slightly firm.
If you notice any butter pooling at the edges, that’s perfectly fine. It’ll help prevent sticking and add extra richness to your finished dish.
Step 5. Gently Fold Eggs Repeatedly
Using a spatula with smooth, deliberate movements, start folding the eggs from the outer edges toward the center of the pan. You’ll notice the eggs beginning to form soft curds as you gently lift and fold the mixture.
Keep the heat at medium-low to prevent browning. Continue this folding motion every 30 seconds, letting the runny egg fill in the spaces you create. Don’t rush this process – it’s your chance to build those perfect, fluffy layers! The entire folding process should take about 3-4 minutes total.
Watch for visual cues that tell you when you’re getting close to done. The eggs should look glossy and slightly wet, with large, pillowy curds forming. They’ll continue cooking from residual heat, so remove them from the stove when they’re still a bit runnier than you’d like.
If you see any small curds forming too quickly, simply incorporate them into the larger curds as you fold.
Your goal is to create tender, evenly-cooked scrambled eggs with visible layers that’ll perfectly showcase those fresh herbs you’ve added.
Step 6. Season Eggs With Salt
While your eggs are forming those beautiful curds, it’s time to address seasoning. You’ll want to sprinkle about 1/4 teaspoon of kosher salt per three eggs into your pan.
Don’t worry if you’re not exact – you can always adjust the seasoning later.
Watch how the salt interacts with your eggs as you continue folding. You’ll notice the texture becoming slightly firmer as the salt draws out some moisture. This is exactly what you want for perfectly seasoned scrambled eggs.
If you’re using table salt instead of kosher salt, reduce the amount by half since it’s more concentrated. Remember that different salt crystals have different intensities, so always start with less than you think you need.
For the best results, add your salt in two stages. Use half during the cooking process and reserve the other half for final adjustments just before serving. This method gives you more control over the final taste and helps prevent over-salting.
Test the seasoning when your eggs are almost done. They should taste well-seasoned but not salty – you still want those fresh herb flavors to shine through!
Step 7. Remove Eggs From Heat
Just before your eggs reach their final texture, pull the pan off the heat to prevent overcooking. The residual warmth from the pan will continue cooking the eggs for another minute or so, helping you achieve that perfect, creamy consistency.
You’ll know it’s time to remove the eggs when they’re still slightly wet-looking but starting to set around the edges. Don’t wait until they look completely done, or you’ll end up with dry, rubbery eggs!
Give the eggs one final, gentle fold with your spatula to incorporate any remaining liquid. The eggs should look glossy and form soft, pillowy curds that hold their shape but still have a slight jiggle to them.
Let the eggs rest in the warm pan for 30-45 seconds, allowing them to finish cooking from the residual heat. If you’re adding delicate herbs like chives or parsley, now’s the perfect time to sprinkle them on top.
Transfer your eggs to a warm plate right away. They’ll continue to set slightly as you serve them, reaching that ideal consistency that makes scrambled eggs so satisfying.
Tips and Variations
When you’re selecting herbs for your scrambled eggs, look for ones with vibrant color and a fresh, strong aroma – basil, chives, and tarragon are excellent choices.
You’ll get the best results by pairing your herb-infused eggs with melted cheeses that complement rather than overpower the herbs, such as mild Gruyere or creamy goat cheese.
Keep your pan at medium-low heat throughout cooking to prevent the eggs from drying out, and you’ll end up with perfectly creamy, herb-flecked scrambled eggs every time.
Choosing Fresh Herbs
Since fresh herbs can dramatically transform ordinary scrambled eggs into a gourmet dish, it’s essential to select the right varieties and verify they’re at peak freshness. Look for herbs with vibrant color and strong aroma – they should be free from wilting, yellowing, or dark spots.
When shopping, you’ll want to choose herbs with firm, crisp stems and leaves that aren’t drooping. Give them a gentle squeeze – fresh herbs should feel perky and springy, not limp or mushy. Soft herbs like chives, parsley, and basil are perfect for scrambled eggs!
Store your herbs properly to maintain their freshness. Trim the stems at an angle, then place them in a glass with about an inch of water, just like you’d with fresh flowers. Cover loosely with a plastic bag and refrigerate for up to a week.
Before using your herbs, wash them gently in cool water and pat them completely dry. Remove any tough stems and chop the leaves just before adding them to your eggs – this preserves their essential oils and delivers the most flavor to your dish.
Best Cheese Pairings
Along with fresh herbs, the right cheese selection can elevate your scrambled eggs from basic to extraordinary. The key is choosing cheeses that melt smoothly and complement your chosen herbs without overpowering them.
For Mediterranean-style herbs like basil and oregano, try crumbled feta or fresh mozzarella. You’ll want about 2 tablespoons of cheese per three eggs. Sprinkle it in just as the eggs begin to set.
Parmesan pairs beautifully with sage and thyme – just add 1 tablespoon of finely grated cheese during the final minute of cooking. The nutty flavor creates a perfect balance with these earthy herbs.
For a French twist, combine Gruyère or Comté with tarragon or chives. Use 3 tablespoons of shredded cheese and fold it in gently as you’re finishing the eggs.
Goat cheese works wonderfully with dill or parsley. Add 1.5 ounces of soft goat cheese in small dollops just before your eggs are done – it’ll create pockets of creamy tanginess throughout!
Cooking Temperature Tips
Proper temperature control makes the difference between silky, tender scrambled eggs and rubbery, overcooked ones.
You’ll want to start with a medium-low heat setting on your stovetop, which gives you the control you need for perfectly creamy results.
Before adding your eggs, test the pan’s temperature by sprinkling a few drops of water – they should sizzle gently but not aggressively bounce. If your pan’s too hot, simply lift it off the heat for 30 seconds to cool down.
Pour your beaten eggs into the pan and wait until you see small bubbles forming around the edges. That’s your signal to start stirring!
Keep the heat steady as you fold the eggs, and don’t be afraid to temporarily remove the pan from the burner if things are moving too quickly.
For the final stage, turn off the heat when the eggs are still slightly wet – they’ll continue cooking from residual heat.
You’ll know you’ve nailed it when the eggs are glossy and just set, but not dry or browned.
Storage Suggestions
Leftover herb-infused scrambled eggs should be stored in an airtight container in the refrigerator and consumed within 2 days. For best results, let them cool completely before storing to prevent excess moisture from forming inside your container.
You’ll want to place your eggs in a glass or BPA-free plastic container with a tight-fitting lid. Don’t use metal containers, as they can react with the eggs and affect their taste. Make sure to press out as much air as possible before sealing.
When you’re ready to reheat your eggs, don’t microwave them – they’ll turn rubbery! Instead, warm them in a non-stick pan over medium-low heat for 2-3 minutes. Add a splash of milk or cream (about 1 tablespoon per cup of eggs) to restore moisture.
If you’re meal prepping for the week, it’s better to store your fresh herbs separately from your cooked eggs. Keep the chopped herbs in a paper towel-lined container, and sprinkle them on your reheated eggs just before serving. This way, they’ll maintain their vibrant color and fresh flavor!
Serving Suggestions
These herb-infused scrambled eggs pair beautifully with toasted sourdough or crusty artisan bread. You’ll love how versatile this dish can be, whether you’re serving it for a casual weekend brunch or a quick weekday breakfast.
For a complete breakfast experience, try these winning combinations:
| Main Component | Side Dish | Garnish |
| Scrambled Eggs | Hash Browns | Fresh Chives |
| Scrambled Eggs | Bacon Strips | Cherry Tomatoes |
| Scrambled Eggs | Sautéed Mushrooms | Microgreens |
| Scrambled Eggs | Avocado Slices | Fresh Dill |
| Scrambled Eggs | Grilled Asparagus | Cracked Pepper |
Don’t hesitate to serve these eggs on a warm plate to maintain their ideal temperature. A sprinkle of extra fresh herbs on top just before serving adds both visual appeal and an aromatic boost!
For a modern twist, try serving your eggs in individual ramekins alongside a fresh green salad. You can also spoon them onto toasted English muffins and top with a dash of hot sauce for an elevated breakfast sandwich that’ll start your day right.
Conclusion
Transform your morning routine with a burst of garden-fresh magic. These herb-infused scrambled eggs elevate a simple breakfast into an inspiring culinary moment, where each bite carries the essence of fresh herbs and endless possibility.
The beauty of this dish lies in its elegant simplicity. Fresh herbs transform ordinary eggs into something extraordinary, whether you have five minutes or fifty to prepare your morning meal.
Start your day feeling accomplished and energized with this aromatic creation – a perfect reminder that even the smallest touches can make everyday cooking truly exceptional.